Introduction
Hey friend! So you’re gearing up for your first hang‑on tree stand installation, and your heart’s racing—part excitement, part nerves? [friendly phrase] I remember that buzz—the first time I clipped in and hauled my stand up. I felt triumphant, but also my knees were knocking. That’s totally normal! This guide is like chatting with a buddy: we’ll walk through every stage—gear, safety, installation, and settling in—so you’ll go from “Whoa, am I ready?” to “Bring it on!” By the end, you’ll be up that tree calm, safe, and ready. Let’s do this!
Why Pick a Hang‑On Stand?
Mobility & Flexibility
Lightweight—under 25 lb—your stand can change spots easily. Follow game patterns, adjust for wind, or move seasons without a bulky ladder strapped to your truck.
Budget-Friendly
Less expensive than ladder or tower stands. Great value for solo hunters who want easy handling and portability.
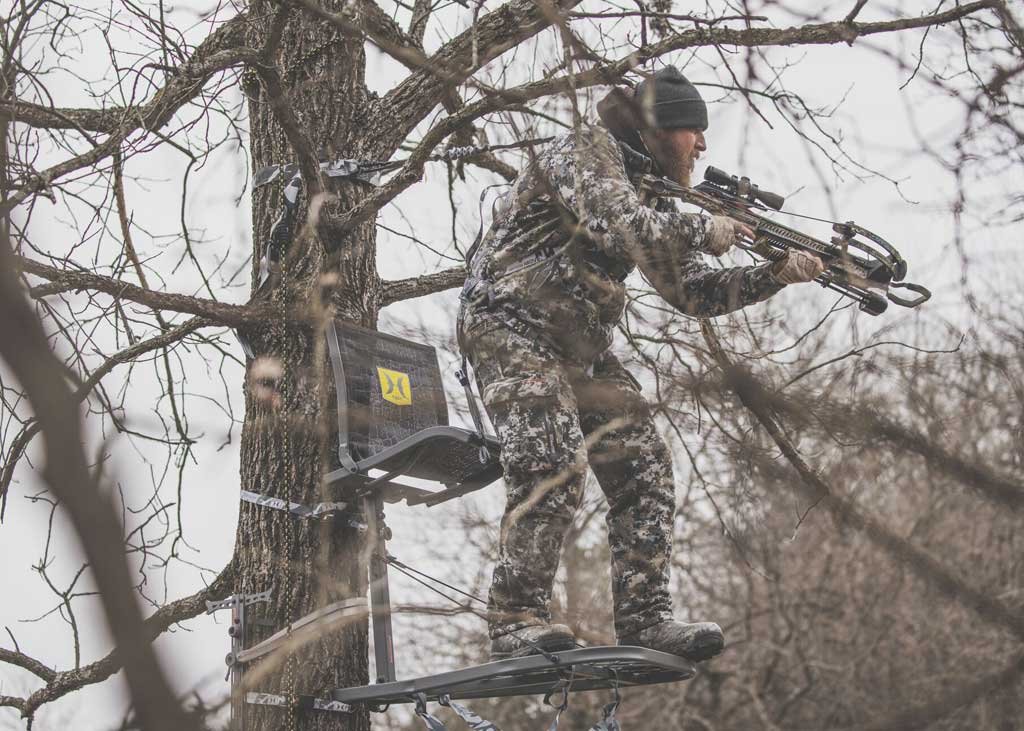
Up‑Close Hunting
A snug fit on the trunk—bring you into the action. [emotion‑driven description] “I felt like a forest whisperer” was my first thought. It’s immersive in the best way.
Prep Before You Go
Gear Checklist
- Hang‑on stand
- Climbing sticks or sectional ladder
- Full-body fall arrest system (FAS) harness
- Lineman’s belt & lifeline
- Ratchet/cam-buckle straps
- Haul line + carabiner
- Non‑slip boots, gloves, small brush, level
Picking the Perfect Tree
- Height & Diameter: 12–18 ft up is ideal; 12–20 in diameter fits most stands and sees—research shows this range avoids swaying and height issues.
- Health & Bark: Live trees with medium-rough bark (like oak) offer a steadier base.
- Straightness: A vertical tree is non-negotiable; any lean could destabilize everything.
Ground-Level Practice
Set up at chest height and test:
- Harness fit
- Climbing steps
- Securing straps
- Climb in/out
Reddit users consistently share how this gives clarity and calm when you’re up high
Safety First—Always
Full‑Body Harness & FAS
These distribute fall forces better than old waist‑belt systems. OSHA mandates full-body gear for elevated work. They save lives—Reddit is full of stories where nearly everyone emphasizes “wear your harness.”
Lineman’s Belt & Lifeline
Wrap the belt around the tree and clip it to your harness before climbing. Clip your harness to the lifeline using a Prusik knot—it locks if you fall but slides while you climb. Experts say always stay hooked, even while sitting; those moments of panic or balance shift happen fast.
Three‑Point Contact
Maintain three points—two feet + one hand—as you climb. It reduces slips and steadies the climb.
Inspect Gear Daily
Check straps, stitching, welds, bolts, carabiners, webbing, and stand integrity before each hunt. Worn gear can fail in a heartbeat.
Step‑by‑Step Installation
Step 1: Climbing Aid
Secure climbing sticks or ladder. Ensure tight fit before each step. Safety-first—each section must lock before weight.
Step 2: Lifeline Setup
Clip it to the tree trunk just above chest level. Attach harness, slide on the rope as you ascend.
Step 3: Haul Up Stand
Use a haul line tied to your harness or belt; pull the folded stand up—don’t carry it. Keep lifeline taut.
Step 4: Position & Level
Seat faces sky, platform flush against bark and level. A spirit level or visual eye-test helps.
Step 5: Strap It Tight
Use two straps: one at seat, one at platform base. Tighten evenly and alternately until snug.
Step 6: Stability Test
Gently wiggle—no creaks, movement, or squeaks. If it shifts, tighten more. A note: ladder stands need ground-level assistants; hang-ons can be solo, but a buddy is always better.
Step 7: Transfer Lifeline
With your belt still on, climb onto the platform. Flip lifeline over stand, attach higher for head-level connection. Then disconnect belt and fully switch to harness tether.
Step 8: Clip In & Unclip Belt
Once lifeline tethered above head, clip harness. Remove belt. At total, only one unsecured moment—when transferring between belt and harness.
Settling In & Hauling Gear
Haul Line Use
Once hooked in, haul your unloaded firearm or bow using a separate rope. Never carry gear while climbing—it’s dangerous.
Comfort & Secure Everything
Use seat cushions, strap a backpack behind you to reduce belly pressure, and pad the platform if needed. Ground-level practice can show what feels right.
Stay Quiet & Scent‑Smart
Silence Is Golden
Quiet debris—use para-cord, muffle straps, and avoid tugging metal. Sound travels far in the forest.
Wind Sense
Always check wind direction and move stand if needed. Scent is your enemy—apps help track shifts.
Clean Gear & Boots
Clean means quieter. Brush off ice, mud, or leaves before climbing, wear non-slip boots, trim boots soles.
Avoid Beginner Mistakes
Slow It Down
Rushing causes slips. Be calm, methodical. Your harness isn’t fail protection—it’s backup.
Don’t Skip Gear
No harness = trouble. Reddit stew is full of horror stories—wear it every time.
Choose Trees Well
Dead, rotten, cracked—avoid them. Even minor decay can be disastrous.
Weight Limits Matter
Stands have limits; gear counts. Overload is risk. Manuals are clear—stick under max.
Off‑Season Care & Maintenance
Annual Inspections
After season, inspect stitching, straps, cables, welds, bolts, harness expiry. Replace anything frayed or corroded.
Replace Gear Proactively
Straps fade in 2–3 years; harnesses expire around 5 years or after fall incidents. Keep backups and budget for replacements.
Store Smart
Dry, clean storage is essential. Moisture rusts metal; UV degrades webbing.
When to Upgrade or Retire
Watch for Wear Signs
- Frayed straps
- Rusted welds/bolts
- Unstable platform
- Cracked cables
If noticed, retire or repair before use.
Know Gear Lifespan
Harnesses—~5 yrs; lifelines – vary but often 7–10yrs. Bolts and webbing wear fast if exposed. Manufacturer guidelines are your friend.
Conclusion
You made it, friend! We’ve covered every detail—from tree selection to gear, safety systems, installation, and maintenance—drawing from experts, official guidelines, and real-world community advice. [emotion‑driven description] I know it’s a lot—when I started, I also felt overwhelmed—but with every climb, confidence builds. Now, when you hike into that spot, you’ll strap in cool, calm, and ready for the hunt. Safe climbs and tight shots await—happy hunting!
Let me know if you’d like printable checklists, illustrative diagrams, or product gear picks to go with this.
Please read more about the best hang on tree stand.
FAQs
How high should I install it?
12–18 ft is ideal for visibility and easy, safe climbing.
Can I install solo?
Yes! But practice, lifeline, harness, and let someone know location. A buddy adds safety and ease.
Is lifeline essential?
Absolutely. It’s your main safety tether while ascending and in-stand. Falls happen quick—don’t risk it.
What if I feel scared up there?
Start low, climb slow, tether early, practice more. That shaky feeling fades fast when you trust your routine. [empathy statement] Can you imagine that moment when you relax and actually enjoy the view?
When should I replace my stand?
At first sign of structural damage or worn gear. Safety isn’t worth it—stand costs less than hospital bills.